February 5th, 2012
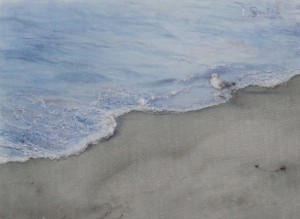 At only 3 x 4 inches this was fairly quick to do. (It didn’t really take a month, I’ve been on vacation : )
I squeezed out a line of gutta along the water edge. When the gutta was dry I painted the sand below in quick strokes with a brush. The gutta stops the sand colour bleeding into the part I want to be blue.
When using gutta there is always a slightly heavier deposit of colour right next to it. The paint stops dead at the gutta and has nowhere else to go except back over on itself. Luckily that’s exactly what I wanted in this picture, as there is naturally a slim shadow cast by the foam itself and the sand really does look darker there.
After painting the water I machine-sewed all crazy with white thread in the foreground to look like foam. This is so forgiving, mistakes only make it better. I also hand stitched some white wool in there at the thickest part for extra volume.
For the gull I used some white wool chopped up and glued down with tacky glue. There are some stitches in there for his legs and wings, and I had to use tiny dots of pastel dye sticks (applied using the tip of a pin) to get the detail of the beak and eye. For a long time little Kenny hovered between life and the dreaded fate of being unpicked and sewn over into foam, but he made it. His shadow was the last thing I painted, and he was all “yay.”
Posted in Posts 2010-2019 | No Comments »
January 1st, 2012
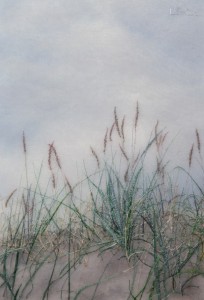
Stuff grew on my dune!
I did some background sewing using the machine but most of the grasses were done by hand. I also had to split threads a lot of times into a single ply, to be able to get those narrow points.
I’ve learned you can run an unthreaded machine needle over painted sand or rock areas to give them more texture. Also not a bad way to make distant footprints or tracks on sand or snow. For even more impact, thread with a thickish thread, run over the areas you want, and then unpick.
This dune is in South Shields, north-east England, also excellent for curries, fish and chips, and ice cream.
Posted in Posts 2010-2019 | No Comments »
November 11th, 2011
 Just the beginnings of a painted background. This is about 5 x 7 inches. There will be grasses, as long as I don’t mess anything up! And I’ll be going stronger on the colours yet, because as soon as you put the first thread through, the background always recedes more than you expect.
Posted in Posts 2010-2019 | No Comments »
October 9th, 2011

This one is very wee at 3 x 3″. It’s based on a photo I took in my Mam and Dad’s garden on my trip to the UK this year. I was trying to take a picture of just the echinacea, but couldn’t get one without a bee doing a photobomb! So I made a feature of it. I like the way both the bee and the flower have a wing.
It’s hand-sewn except for the seedhead. For that, I did a rough background on the machine and then those pesky pointy bits were done by hand.
The bee was great fun to do. I stitched him by hand and then used the sharp end of my needle (oh this sounds horrible now) to rough him up a bit. Did some trimming with scissors around the edges, so his belly is still fat but the edges of him appear further away. There’s some invisible thread on the wing that catches the light.
As a side note, in the course of this picture I’ve learned that in parts of China, because the bee population has been pesticided down, whole villages have to pollinate their crops by hand using paintbrushes. Art imitating life in a way I hope we don’t have to get used to.

A behind-the-scenes look. This is my 7″ diameter hoop.
And I promised myself I wouldn’t make any bee puns, so I’ll quit before I give in to temptation.
Posted in Posts 2010-2019 | No Comments »
September 25th, 2011
Welcome to my made-over website!
For many long and boring reasons, I decided to start from scratch with a template that lets me do the basics even with my limited knowledge.
I expect there’ll be more changes and developments. Websites are never really “done.” But I’m glad to have some simple features functioning and I’m free to pick up my needle again!
Posted in Posts 2010-2019 | No Comments »
August 15th, 2011
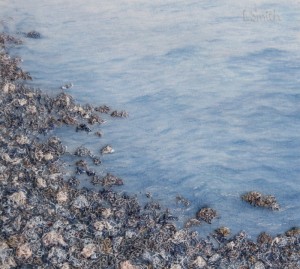 This is a view from the seawall in downtown Vancouver. I see the water and the rocks as reaching out to each other.
The water is painted on silk and then the pebbles/rocks are free motion machine embroidered. There’s a little bit of hand-sewing of shiny or “invisible” threads that can only be seen in certain lighting and helps make the rocks look wet where they touch the water. Oh and a tiny bit of hand-sewing of foam on the water in the foreground.
I got myself a daylight lamp and I love it. I’ve been struggling to get enough light in the right position to do artwork after sundown in what I’ll call my (ahem) “work zone” in our new apartment. 100W equivalent baby! Only wish I’d gone for it sooner.
Posted in Posts 2010-2019 | 2 Comments »
August 13th, 2011
 Every summer should have some Horseshoe Bay in it. On this trip we spotted this lab and decided he was a salty sea dog. Many pics of inspiring scenery taken.
Posted in Posts 2010-2019 | No Comments »
July 30th, 2011
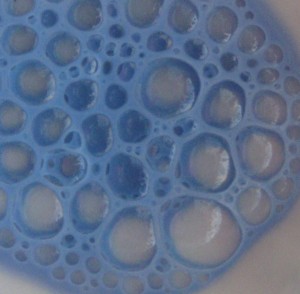 This image is not photoshopped. When I get down to the dregs of my silk paint, it sometimes comes out of the bottle as bubbles. I just thought this looked cool. It’s also fun to watch the change when you add another colour. Anyway, back to painting!
Posted in Posts 2010-2019 | No Comments »
July 24th, 2011
 The street in question is Hornby Street in downtown Vancouver. The art would be the tree, but is also a reference to Vancouver Art Gallery in the background. I was struck by how gorgeous this and other trees around the gallery looked on a sunny day back in May.
After hand-painting the background, I used free motion machine embroidery to represent the mulched soil in the foreground. The tree trunk and branches are also worked in free motion with a little hand-sewing here and there. With the trailing twigs, I found the less I cared about how they should go, the better they looked.
As described in my previous post, I hand-painted a bunch of narrow ribbon strips for the leaves of the tree. Then I hand-stitched the greenery using ribbon instead of thread. Thankfully, silk is less fragile than it looks!
This picture changes depending on the light more than most. In the evenings under a spotlight, the sheen of the ribbon comes into play, hopefully to capture something of the sunlit glory of the tree as I saw it that day.
Posted in Posts 2010-2019 | No Comments »
June 25th, 2011
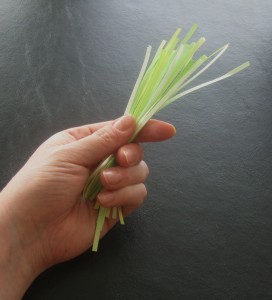
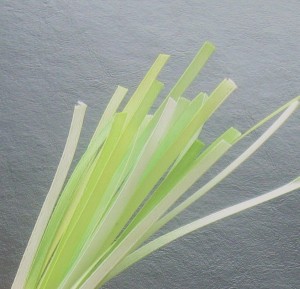 These are lengths of 3-mm wide ribbon I’ve been hand-painting different shades of green. I use the same paint as for my backgrounds.
Yes, ribbon work is ahead! Hopefully, in combination with free motion machine embroidery, the little bits of shiny ribbon that show will look like leaves catching the sun.
Posted in Posts 2010-2019 | No Comments »
 At only 3 x 4 inches this was fairly quick to do. (It didn’t really take a month, I’ve been on vacation : )

 Just the beginnings of a painted background. This is about 5 x 7 inches. There will be grasses, as long as I don’t mess anything up! And I’ll be going stronger on the colours yet, because as soon as you put the first thread through, the background always recedes more than you expect.


 Every summer should have some Horseshoe Bay in it. On this trip we spotted this lab and decided he was a salty sea dog. Many pics of inspiring scenery taken.
 This image is not photoshopped. When I get down to the dregs of my silk paint, it sometimes comes out of the bottle as bubbles. I just thought this looked cool. It’s also fun to watch the change when you add another colour. Anyway, back to painting!

 These are lengths of 3-mm wide ribbon I’ve been hand-painting different shades of green. I use the same