
Full Bloom
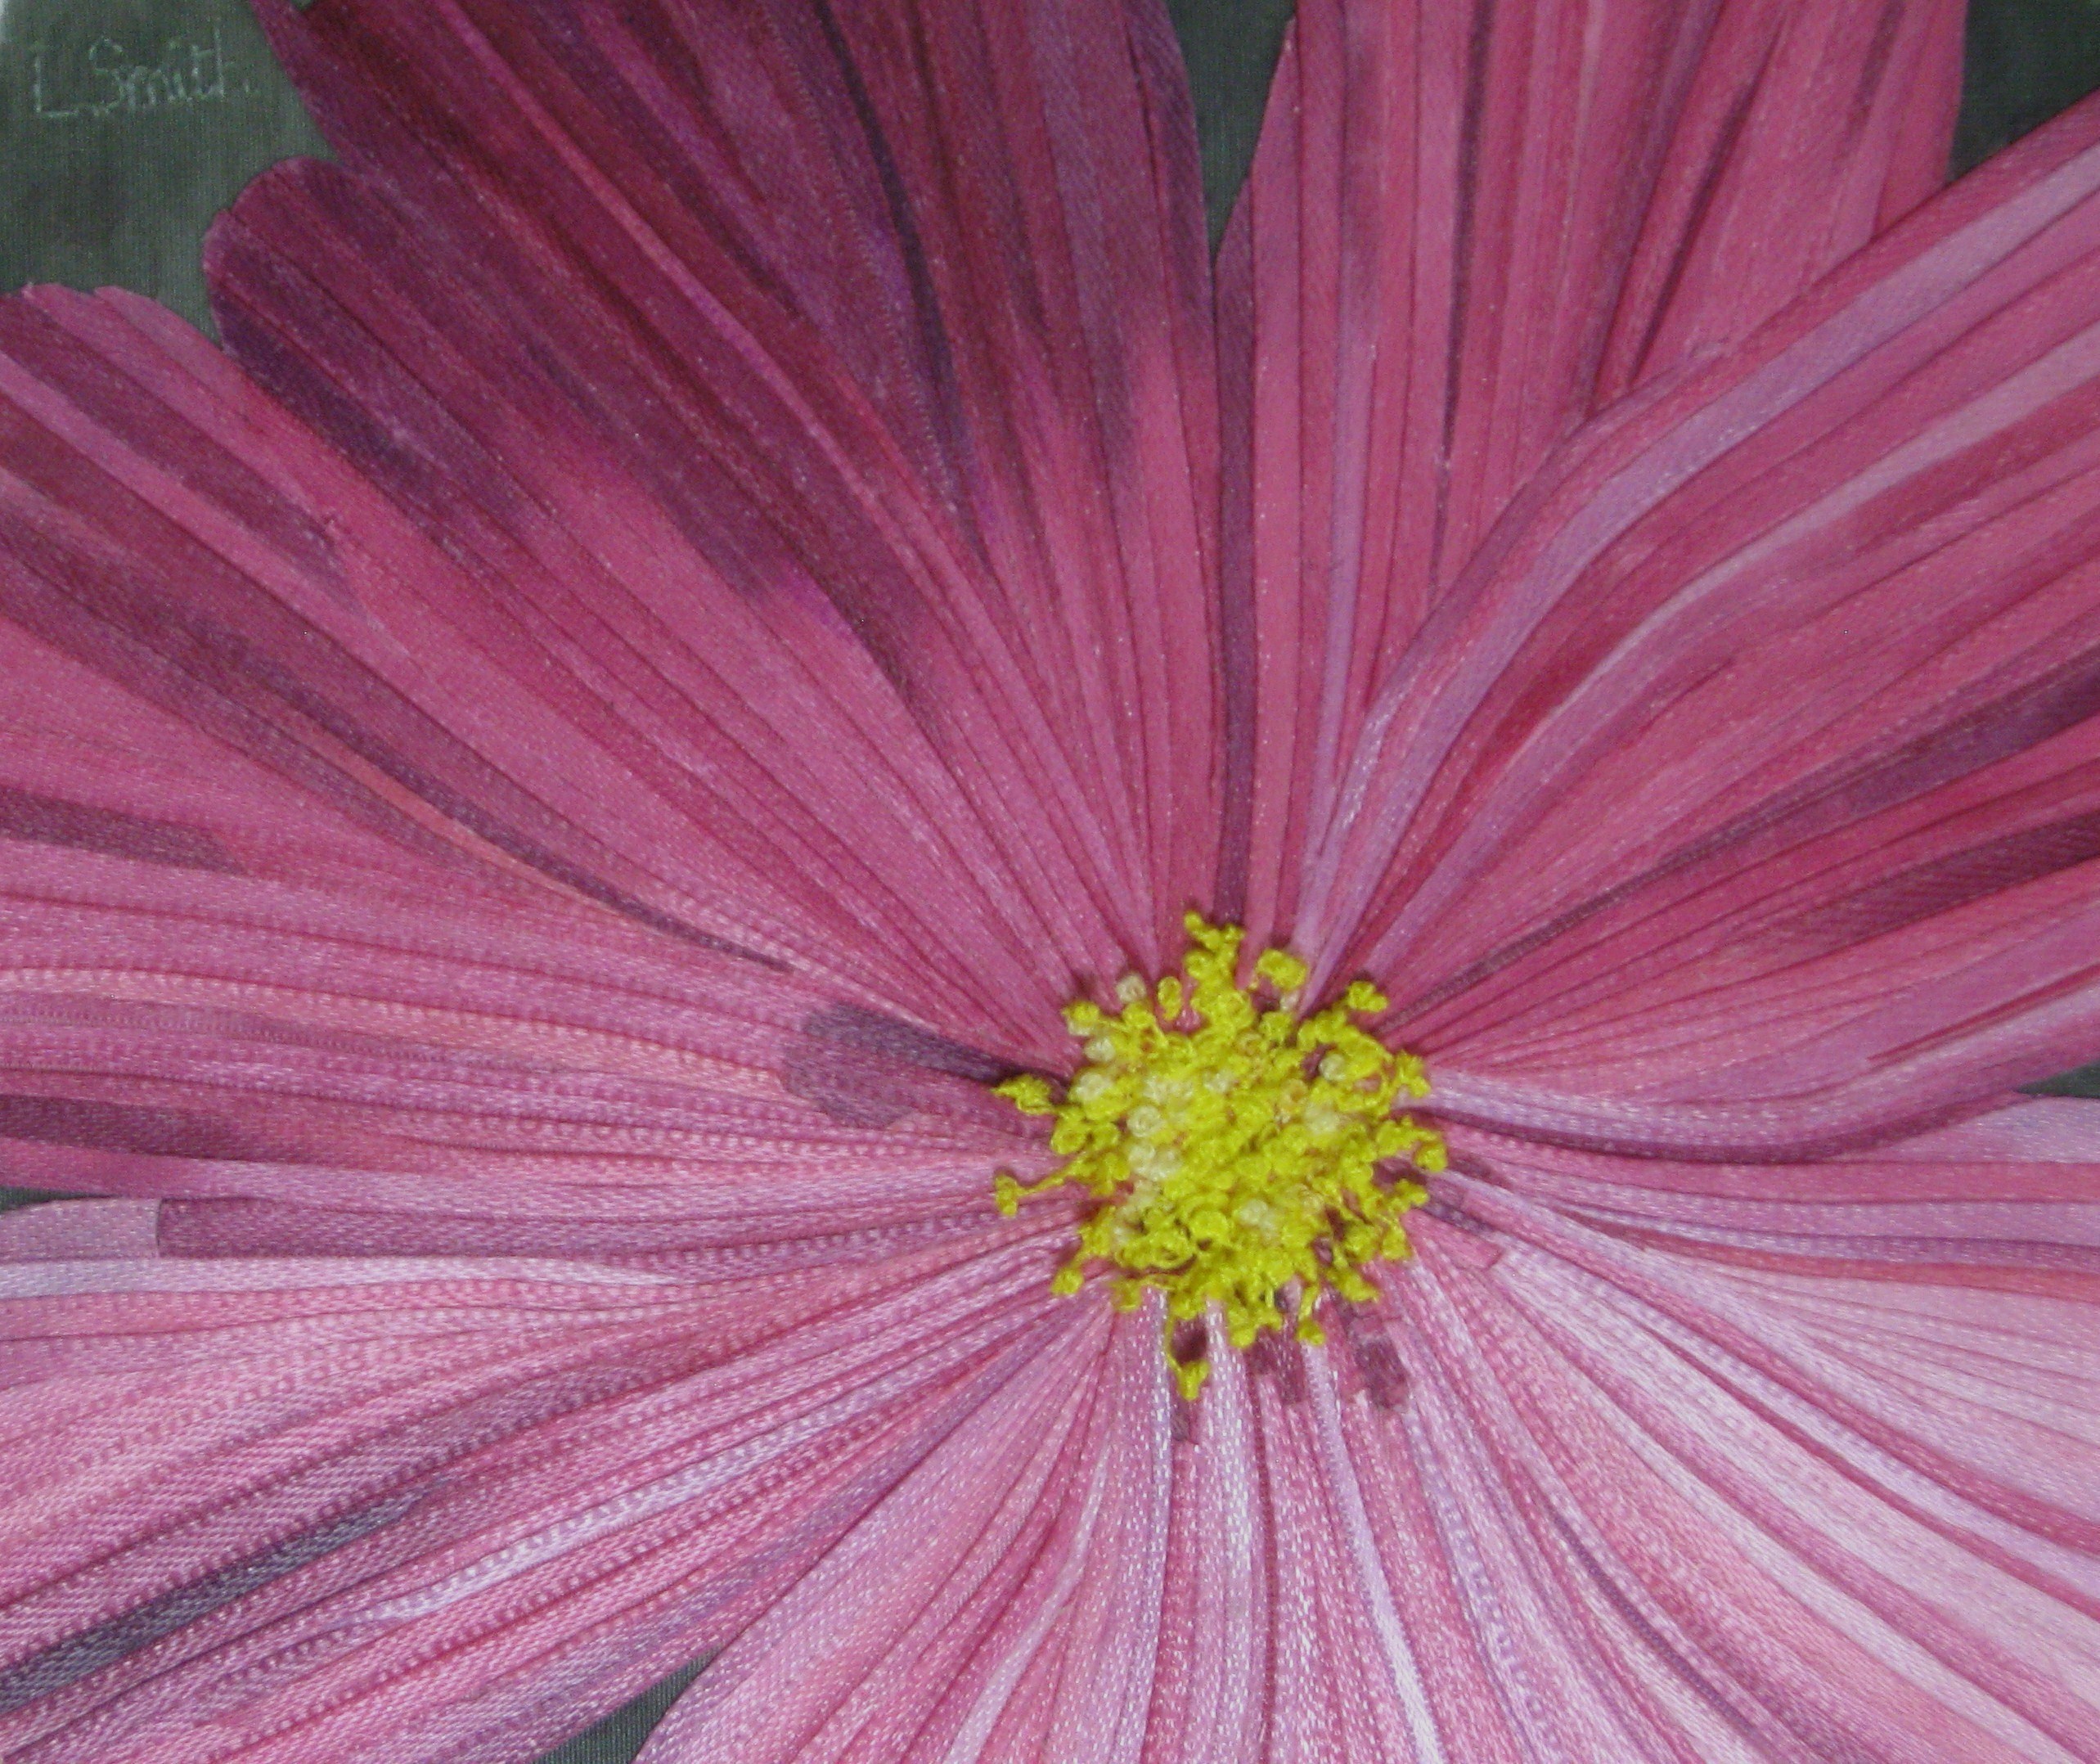
I’ve been doing some ribbon-cutting! This piece is 3.75 x 4.5 inches. You can click on any picture to enlarge.
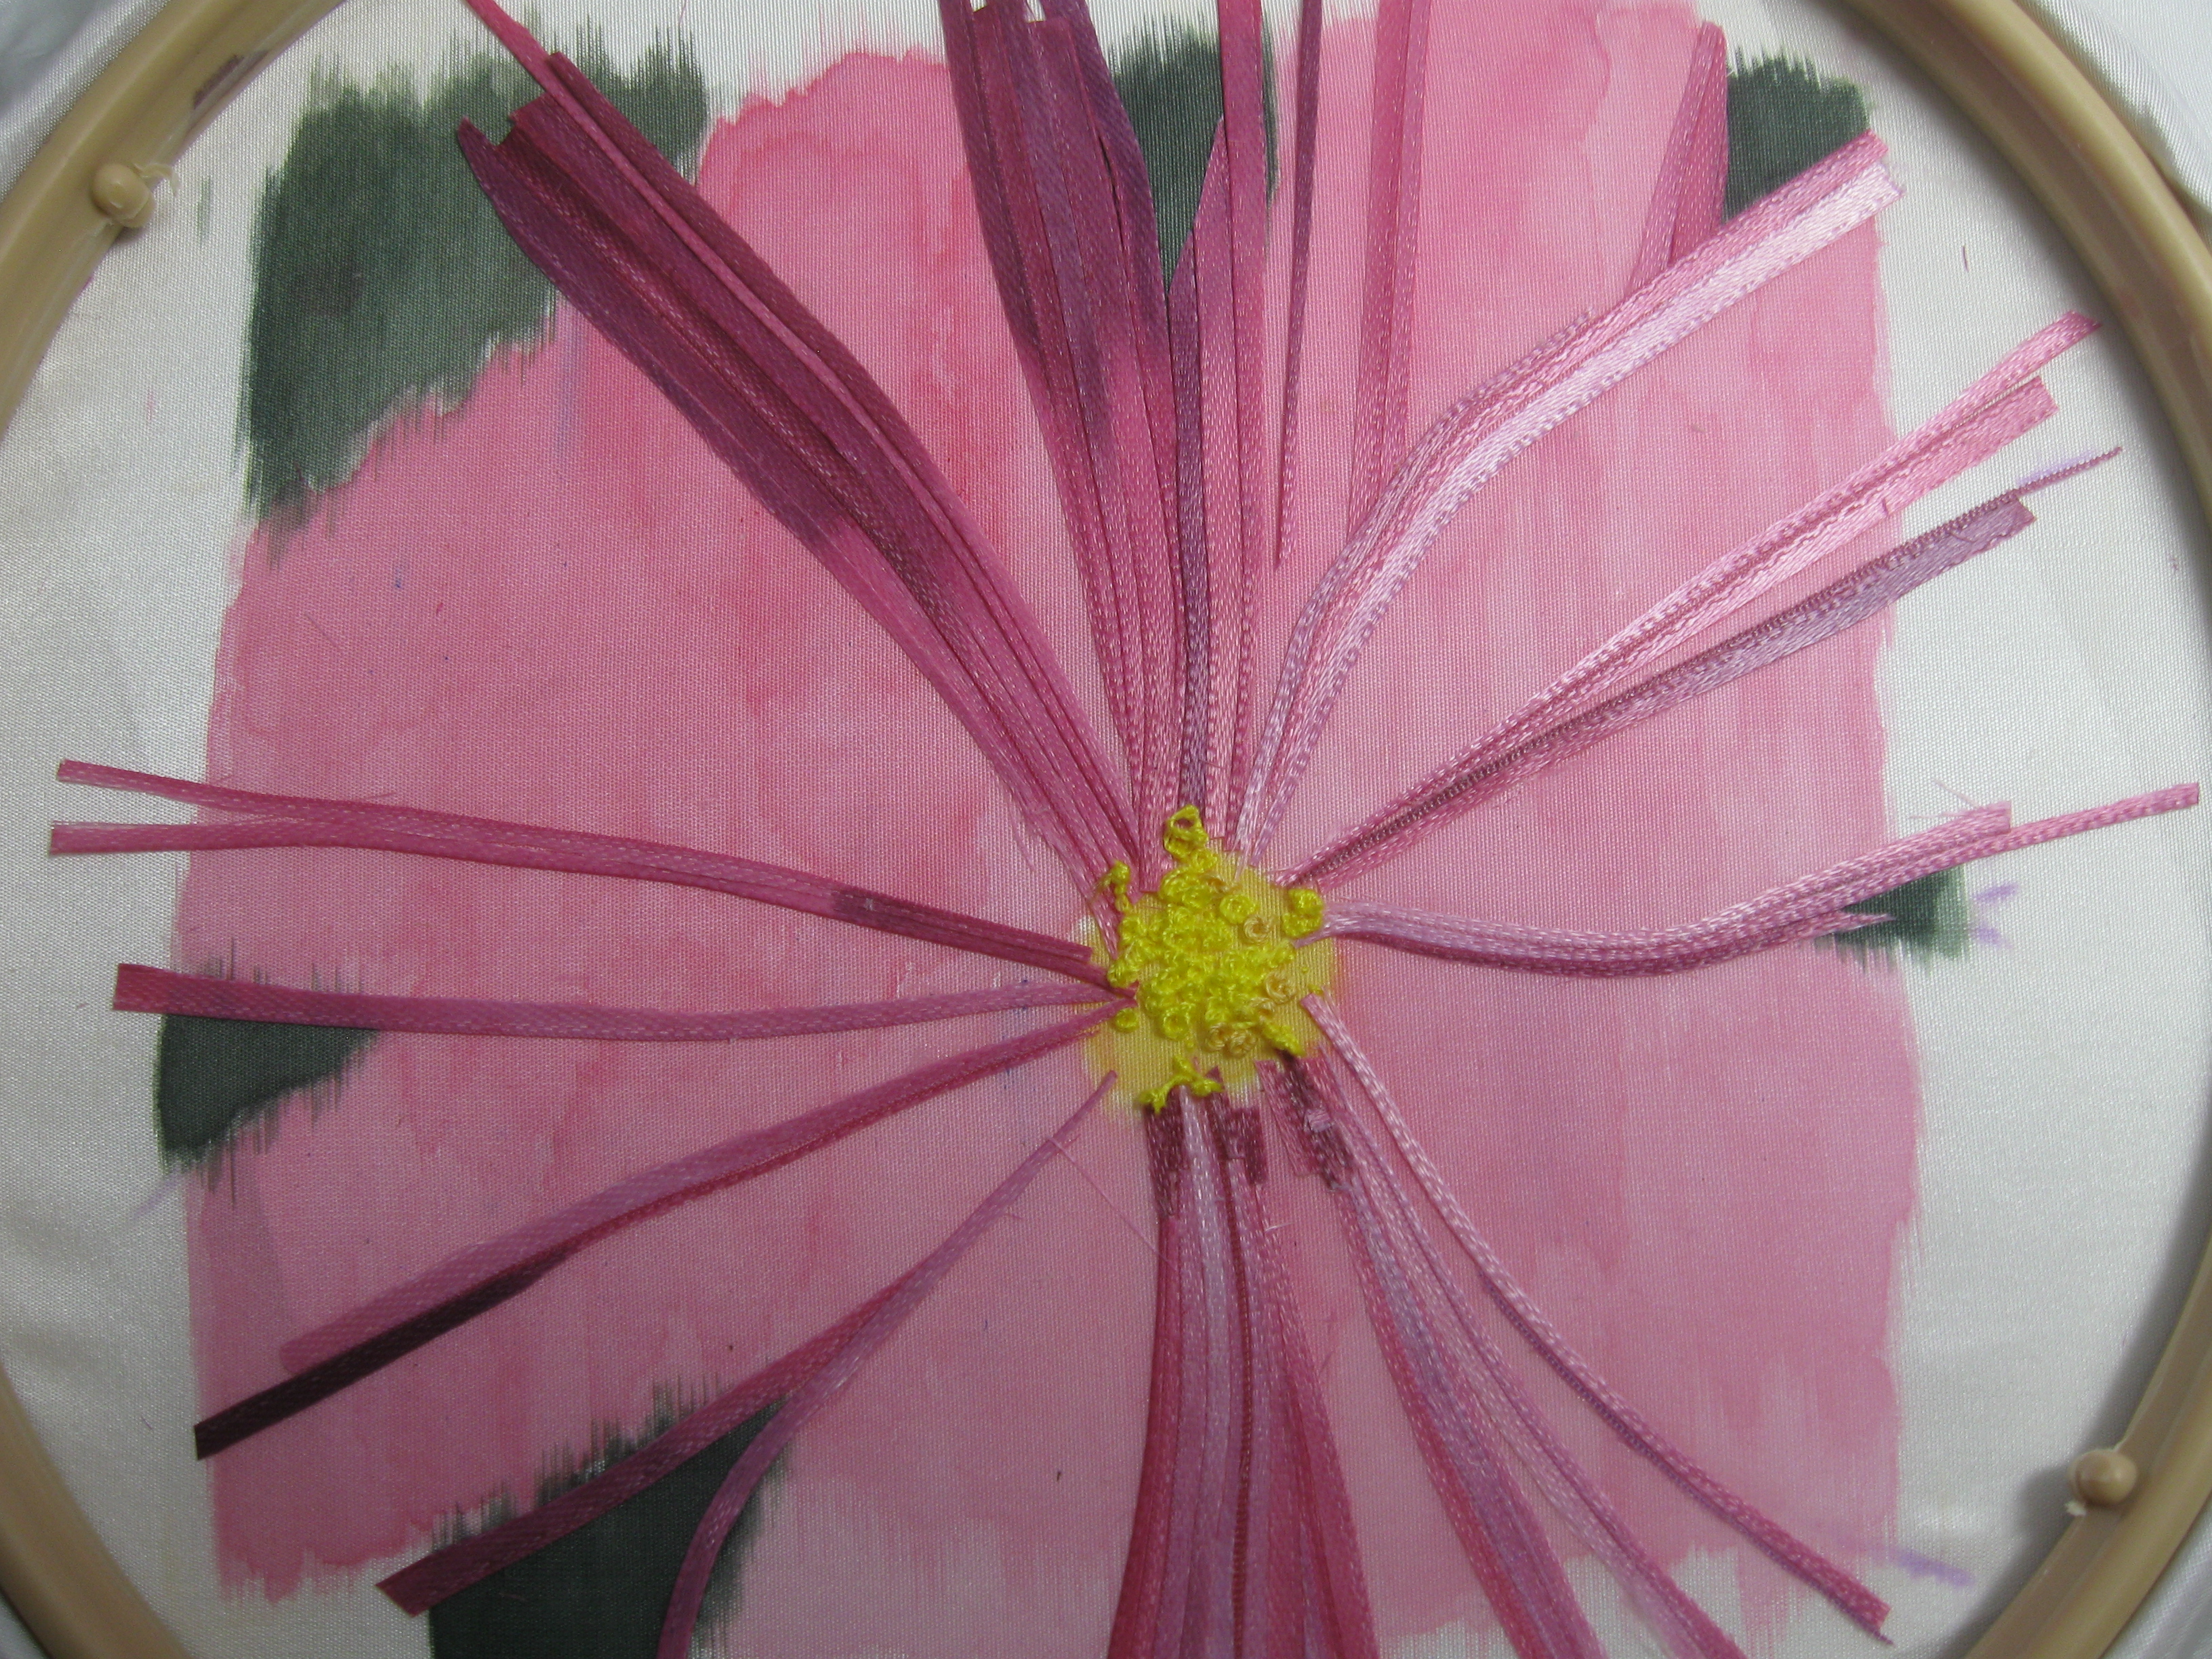
I actually took some in-progress pictures this time!
You can see I first painted a background on the silk. I learned from a brief failed experiment, if you do the green background all over, the dark color shows through the ribbon too easily and makes it look a bit sad and dull. So I painted pale pink where I knew the flower was going to be. It also helps you see where the petals go.
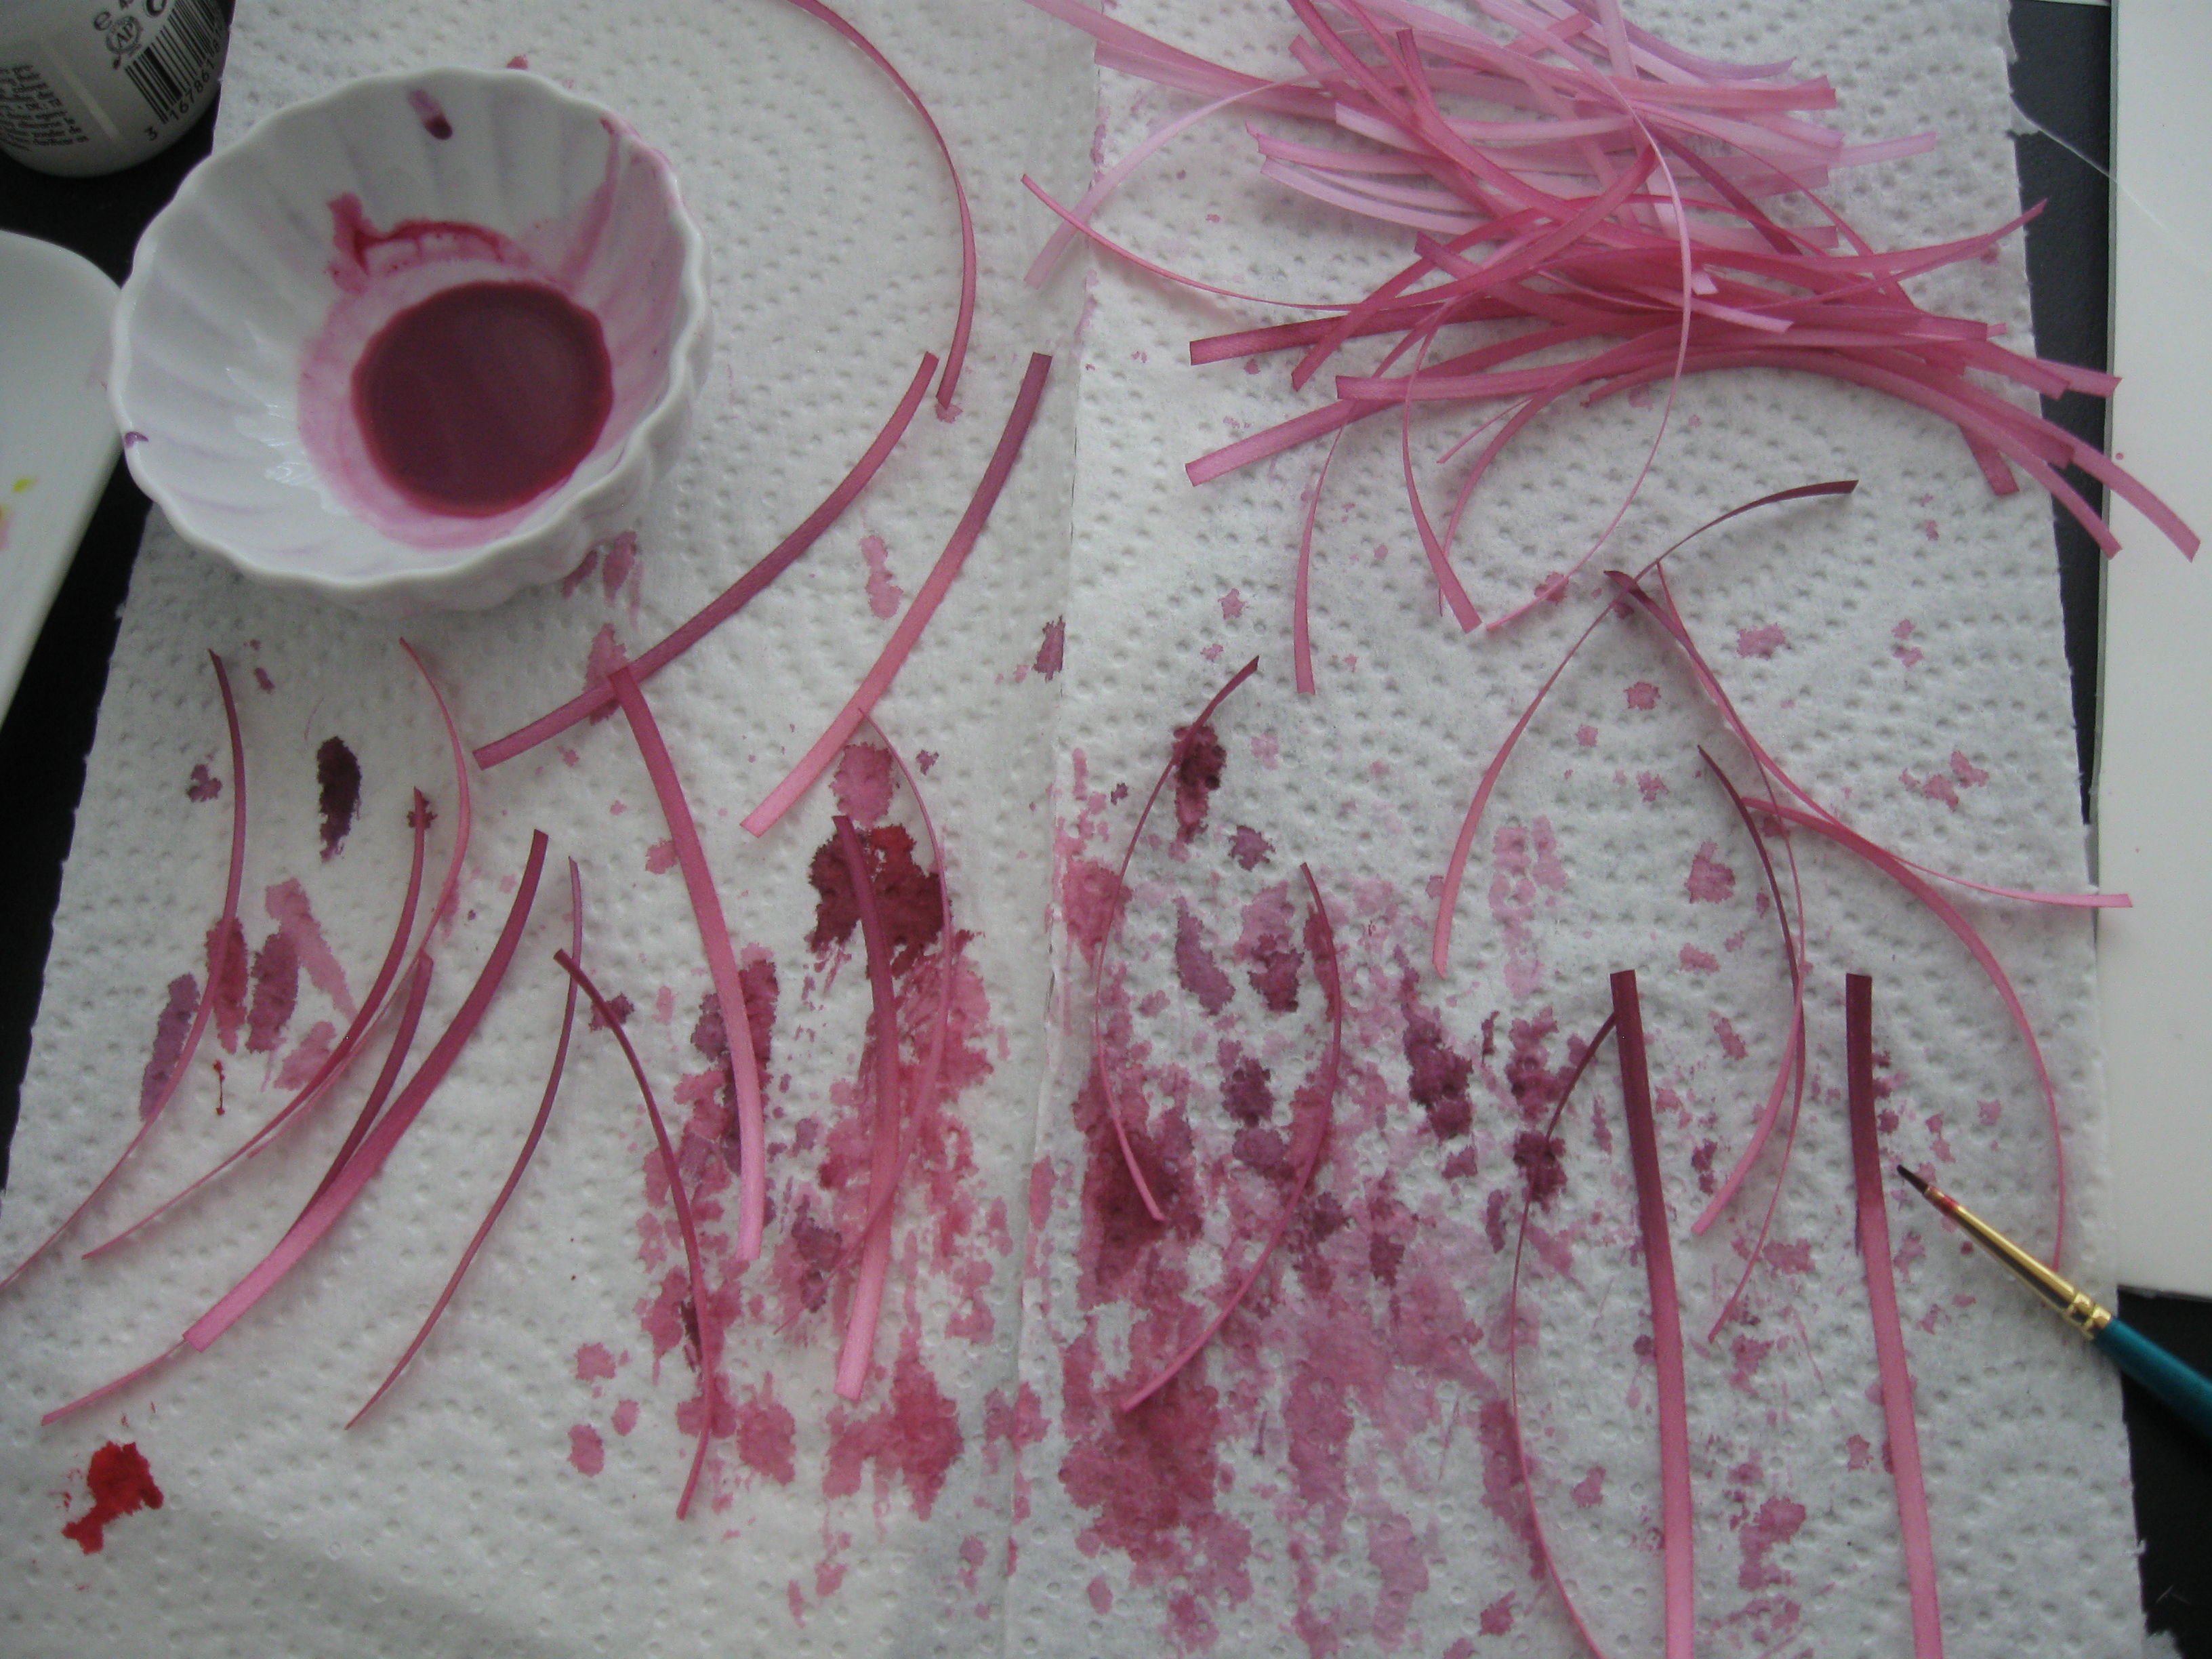
This was me painting the ribbons before gluing them on. The paint really shoots up the ribbon as soon as you touch the brush to it, and I could tell I would have no control over where it would go. I didn’t want to make a big painting mistake after doing all that painstaking gluing.
After painting them with my Pebeo silk paint I ironed them to seal the paint. Also, it’s much easier to work with ribbon that’s flat.
I cut the ribbons to what seemed like the right shapes and glued them to the background with Aleene’s acid free tacky glue. Took a while.
For the middle part, I did lots of French knots in different shades of yellow. I was aiming for imperfect knots (a good job really) because I was trying to make it look like nature, not embroidery. I used non-shiny yellows for a dusty,polleny look.
Finally…
*Fun part alert*
I wanted to make the little anthers spring out from the picture towards the viewer a bit, like they do in real life. I started by tying a big old knot in my yellow thread. This one’s about five knots in one.
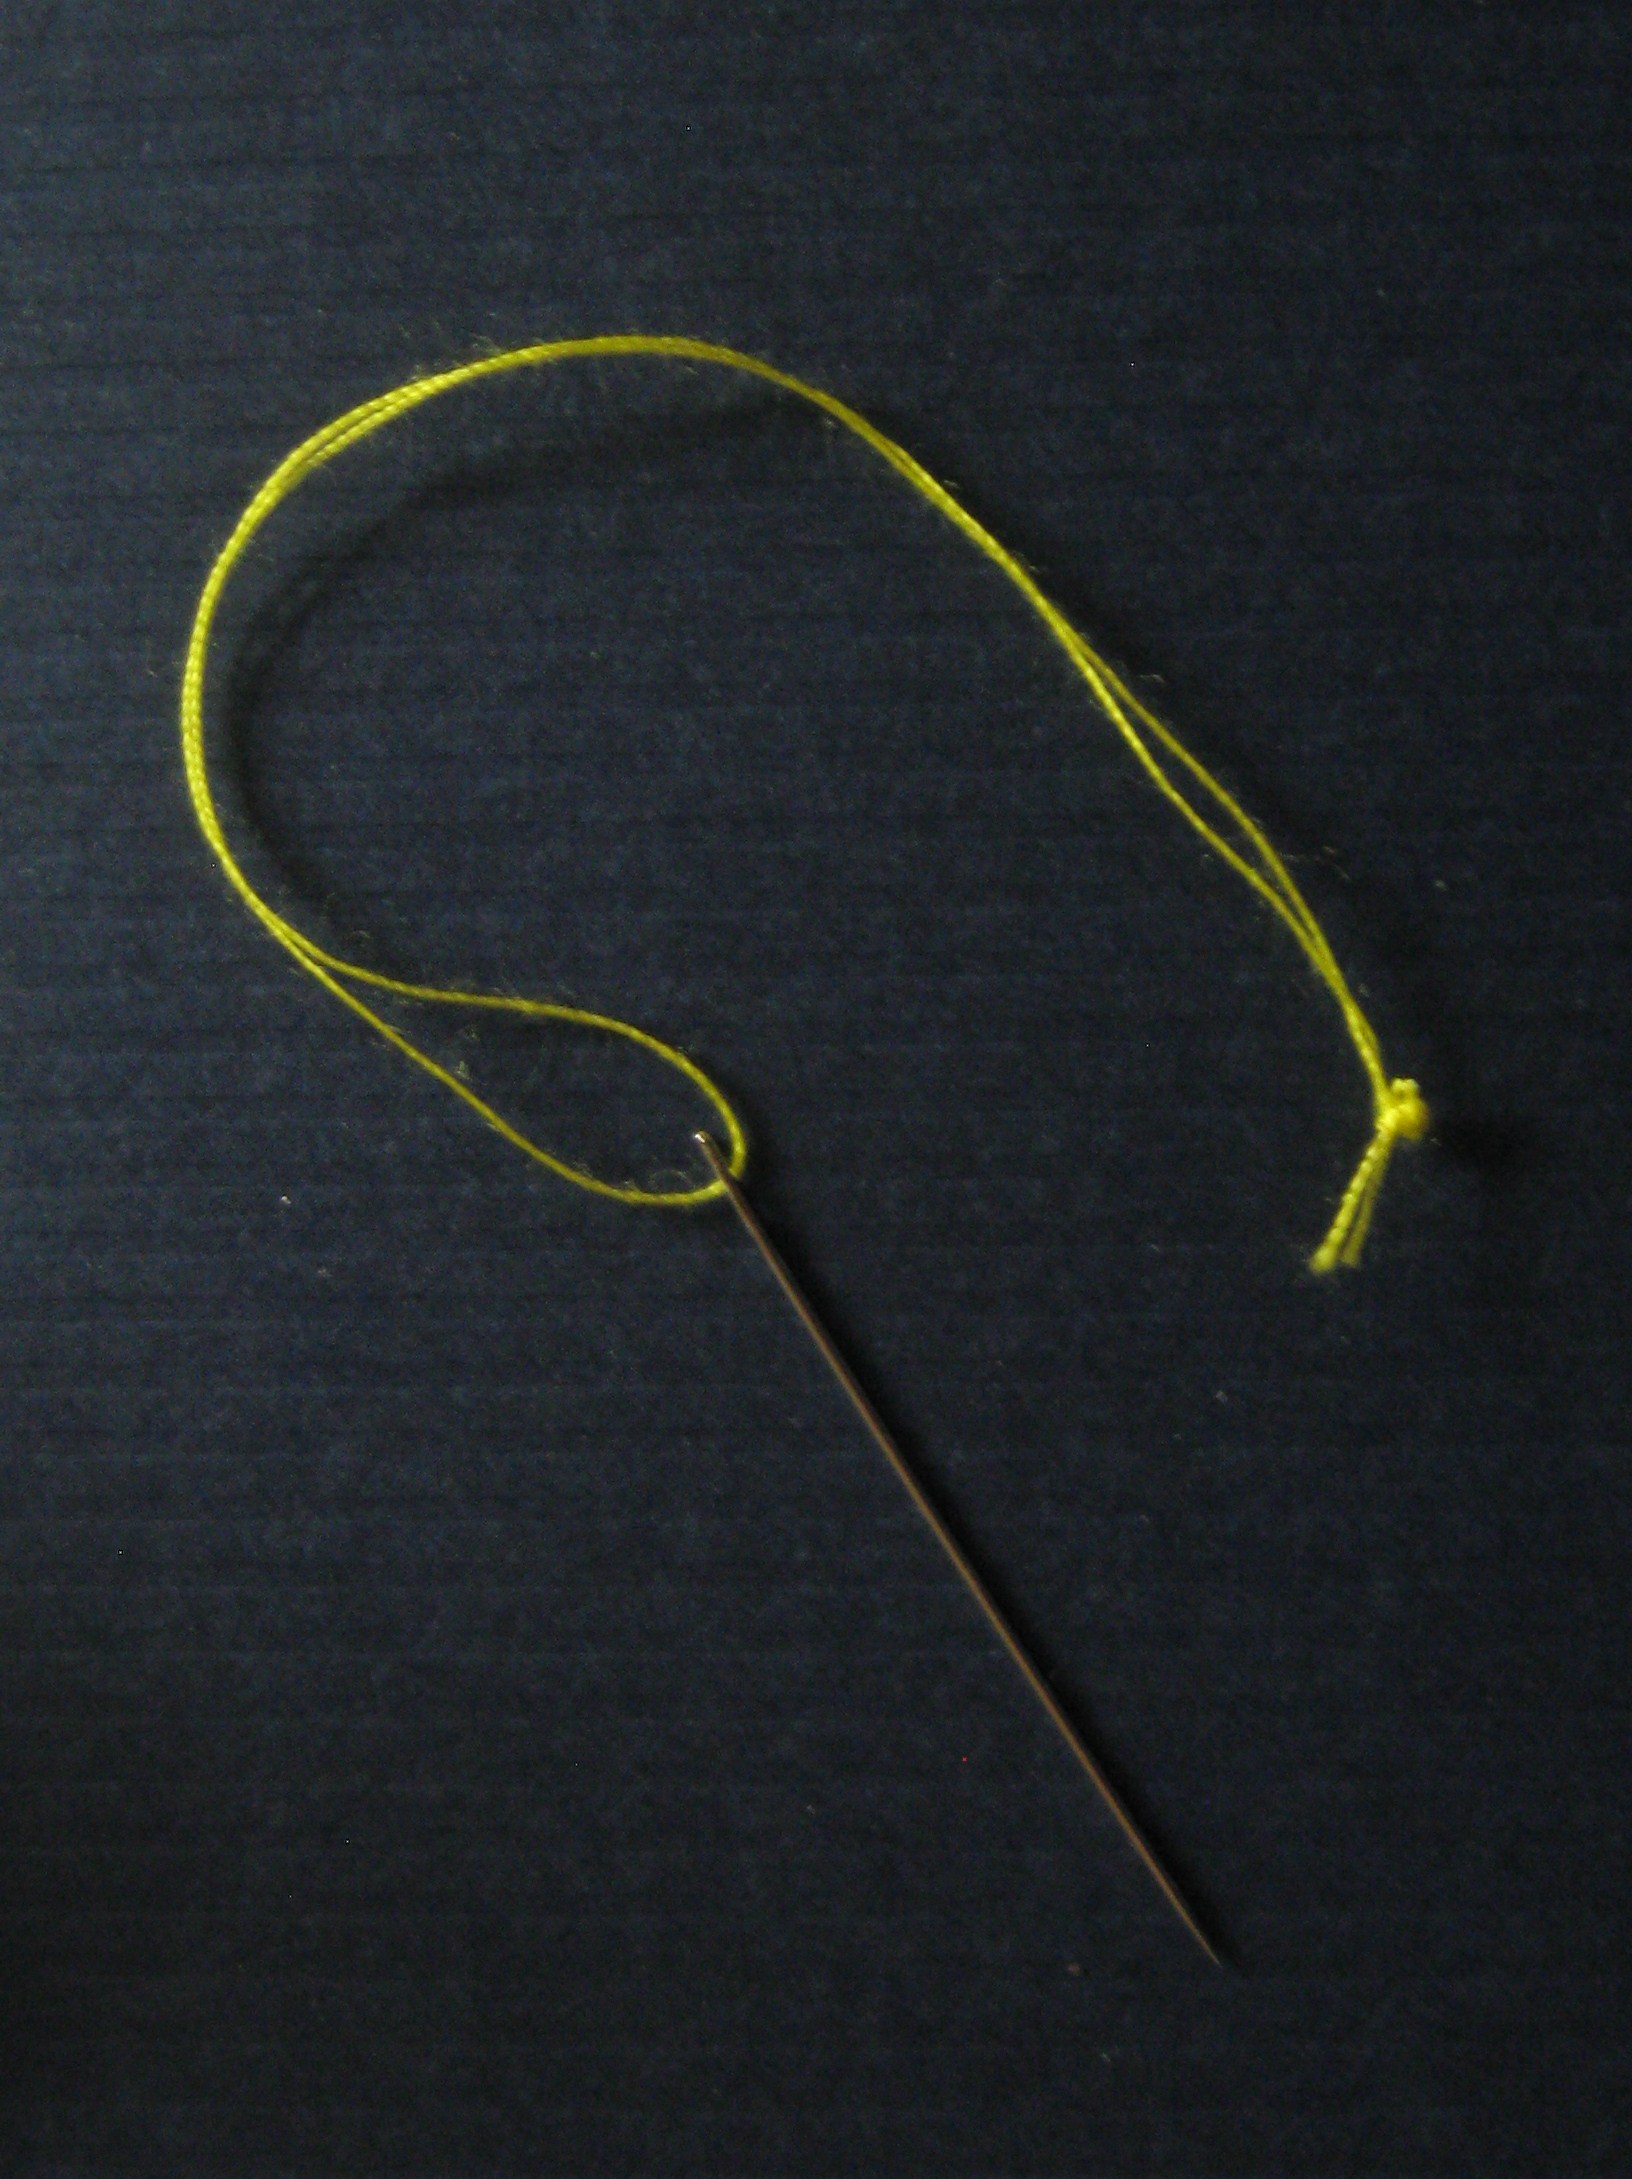

Made a single knot next to the big knot. This can be further along, depending on how long you want the filament to be.
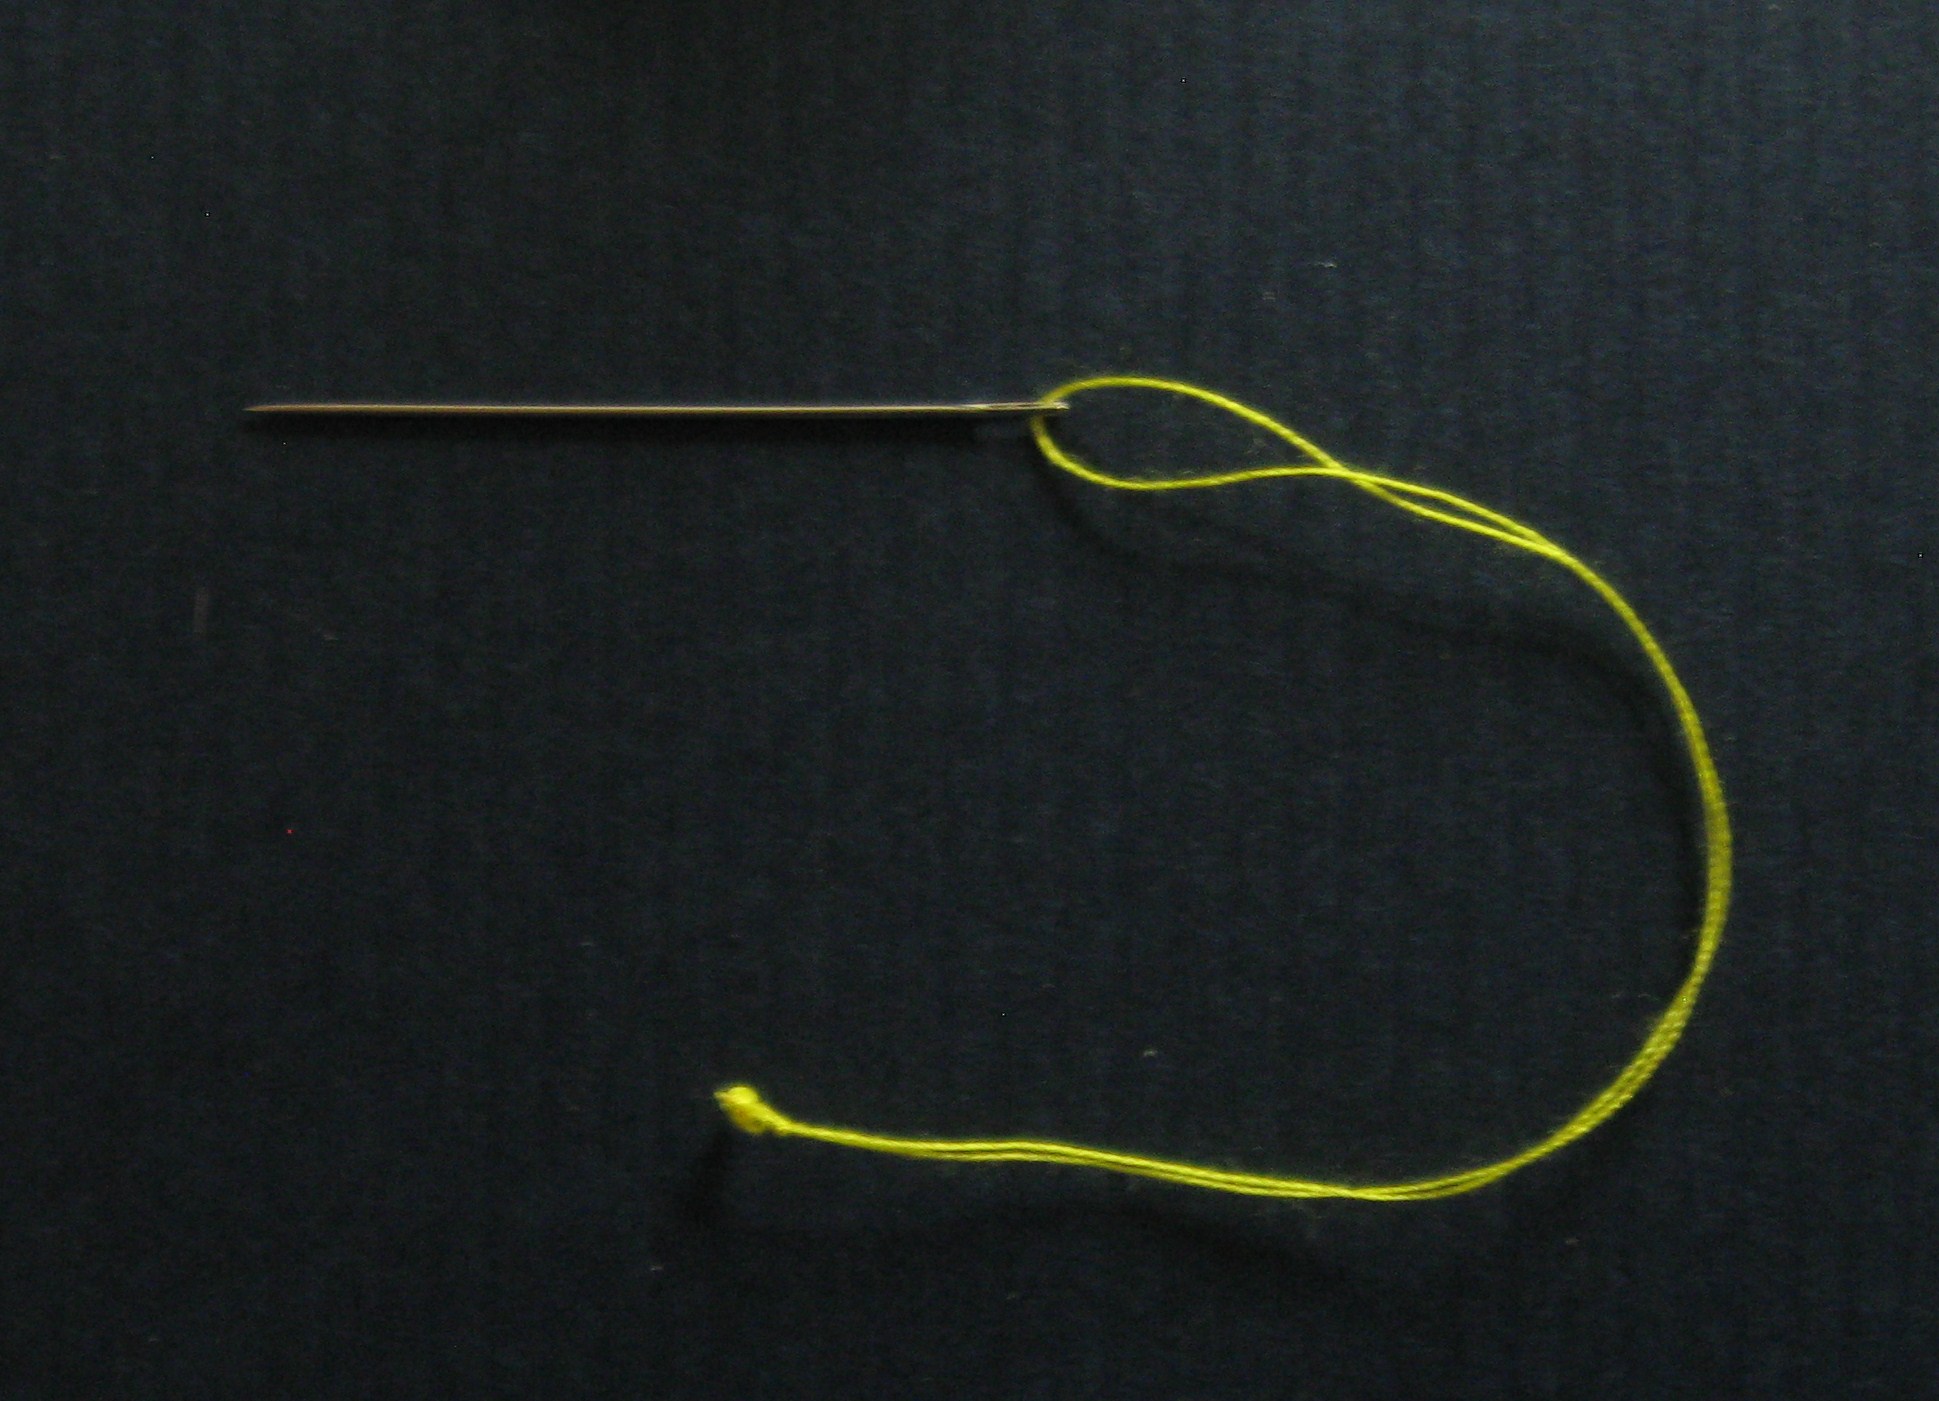
Snipped the ends off. That makes an anther.
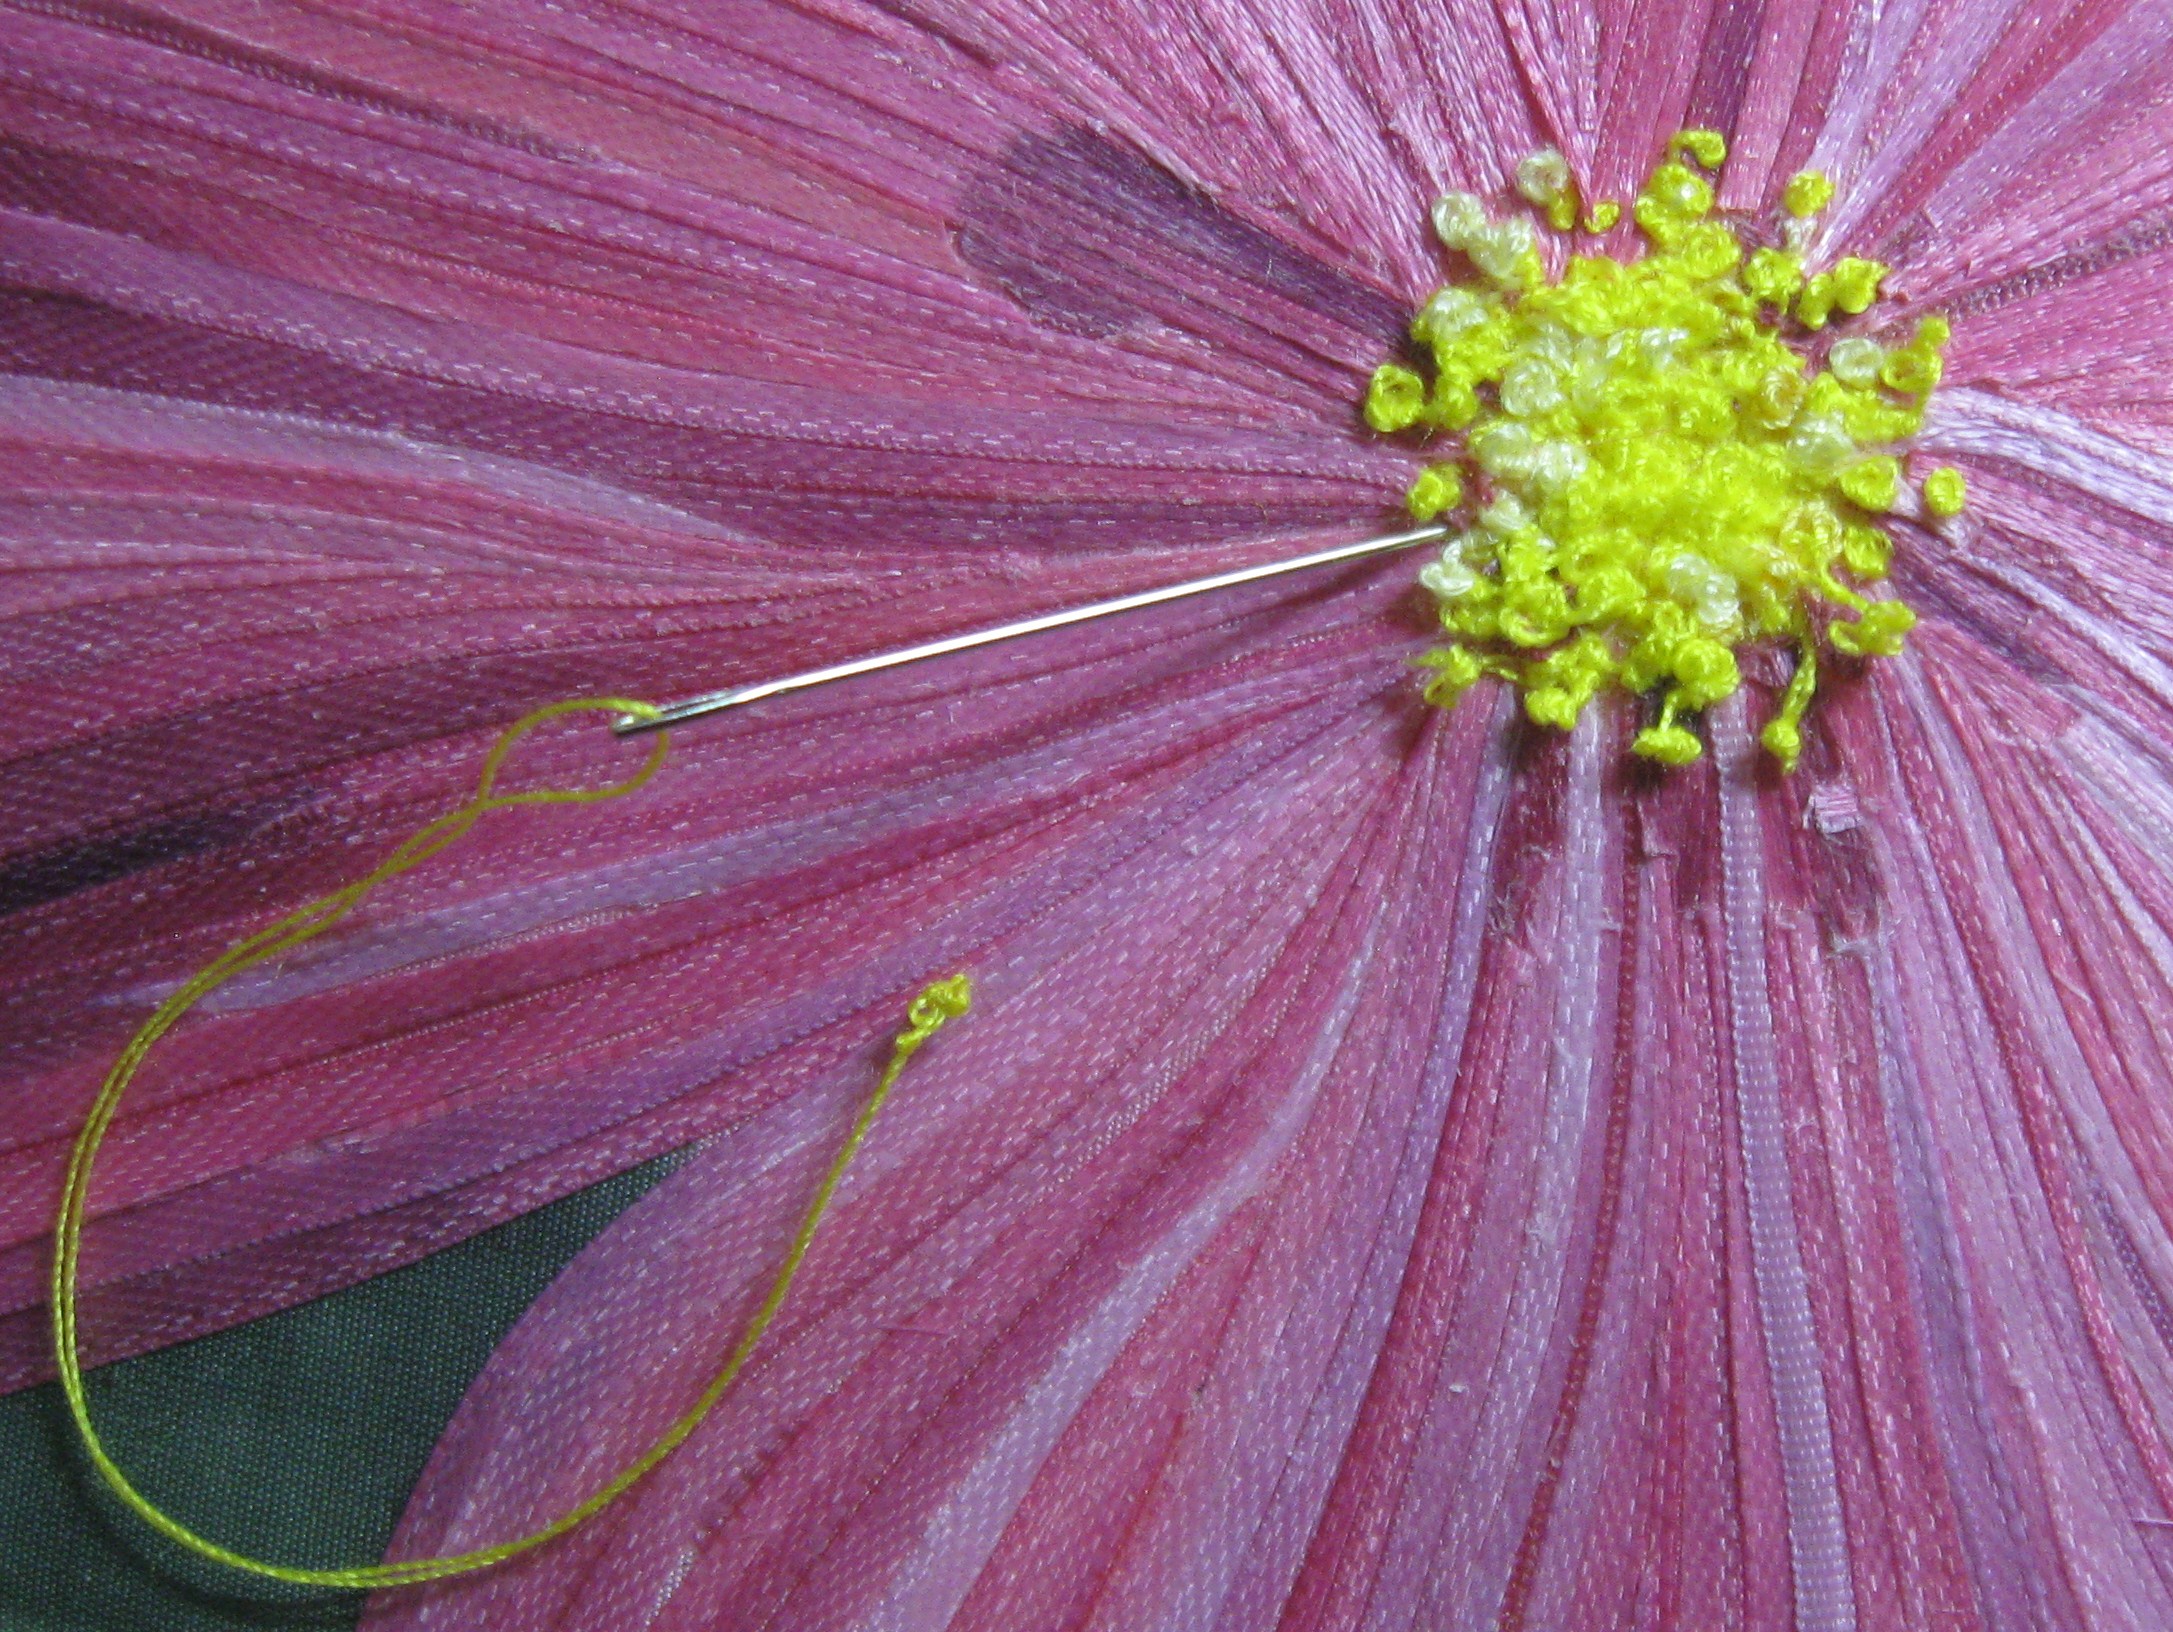
Inserted the needle from the front of the fabric. It stops at the little knot, so the anther appears to be springing out a bit. Sometimes I still used little securing stitches to hold the filaments in place, especially on the upper part because gravity makes them flop down.