April 24th, 2015
Yes a couple of shows coming up! (Click on the poster above to enlarge).
The other one is the first annual Art Mart, a one-day show on July 4, 2015 on the turntable at the Roundhouse in Vancouver (inside if it rains). I’ll be doing sewing and painting demos amongst a couple of dozen crafters and artists showing off their skills.
Posted in Posts 2010-2019 | No Comments »
December 31st, 2014
 3.25 inches x 2.25 inches, hand embroidery on hand-painted silk. For the water I use my super-shiny Sulky rayon. The boat hull is a piece of painted ribbon. For the rigging I stole a weft thread from the raw edge of my piece of silk. One thread can then be split into hair-thin strands for all your rigging embroidery needs. Best not attempted under the influence of eggnog!
The location of this scene is Gibsons, British Columbia (I believe I was facing northeast). Depending on how the painting is lit, the water can look dark or light, so the photo shows a bit of both.
More boats on the way, in my usual well-spaced-out manner : )
Posted in Posts 2010-2019 | 3 Comments »
October 23rd, 2014

I plan to exhibit Blue Plate Special in this fast-approaching show at Shadbolt Centre for the Arts, Burnaby, BC, October 24-26. More details on my Events page. Free admission and free parking!
Posted in Posts 2010-2019 | No Comments »
October 23rd, 2014
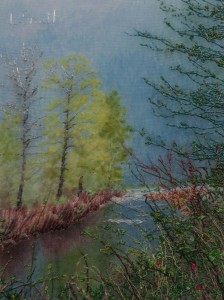
This one’s 3 x 4 inches and made using several techniques. The background is hand-painted on silk (I used gutta to keep the background silk white in the area of “white water”).
The trees in the middle distance are a mix of hand sewing and hand-glued thread lint (made by chopping up thread very finely). Then the foreground tree branches and brush are created mostly using free motion machine embroidery, with occasional hand sewing for details like the bright pink flowers.
This composition is based on a view of a tributary of Pitt Lake, British Columbia, but the finished picture is destined for a new home in Italy. Buon viaggio!
Posted in Posts 2010-2019 | No Comments »
October 23rd, 2014
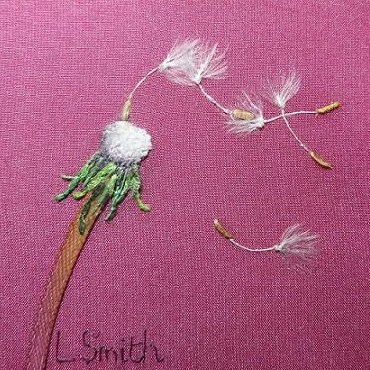 Another dandelion head worked in ribbons and thread, 2.25 inches x 2.25 inches. Here’s a link to my dandelion how-to posts.
Posted in Posts 2010-2019 | No Comments »
September 22nd, 2014
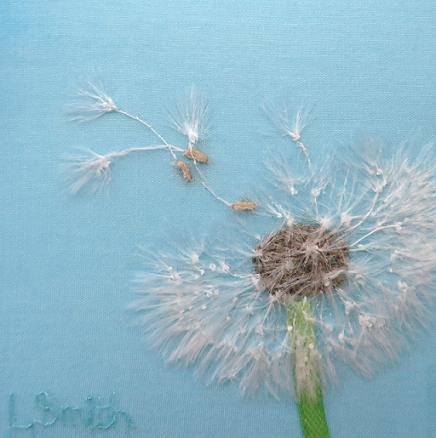
2.25 x 2.25 inches, thread and ribbon on hand-painted silk. Here’s a link to previous posts that describe how I create dandelions using thread and ribbon.
And in event news, there will be an Event! The first since January! I’ll show some pieces in Positively Petite at Place des Arts, Coquitlam, BC, which runs November 13 to December 19, 2014.
Posted in Posts 2010-2019 | 1 Comment »
August 16th, 2014
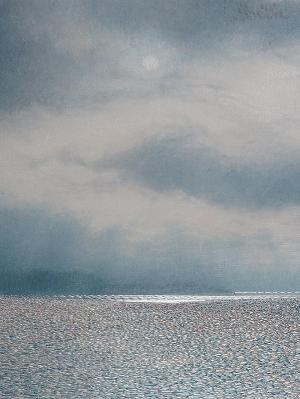
3 x 4 inches, hand stitching on hand-painted silk.
That’s the sun, not the moon…there happened to be some dramatic sky action the day I took the photos inspiring this piece. (It’s a view from the ferry somewhere between Swartz Bay and Horseshoe Bay, BC).
I left the silk free of paint for the circle of the sun. The rest of the colour is gradually built up by painting with half-dry paint. And I think I used about 12 different shades of shiny thread for the water. Yet I still want more : )
Posted in Posts 2010-2019 | No Comments »
July 13th, 2014
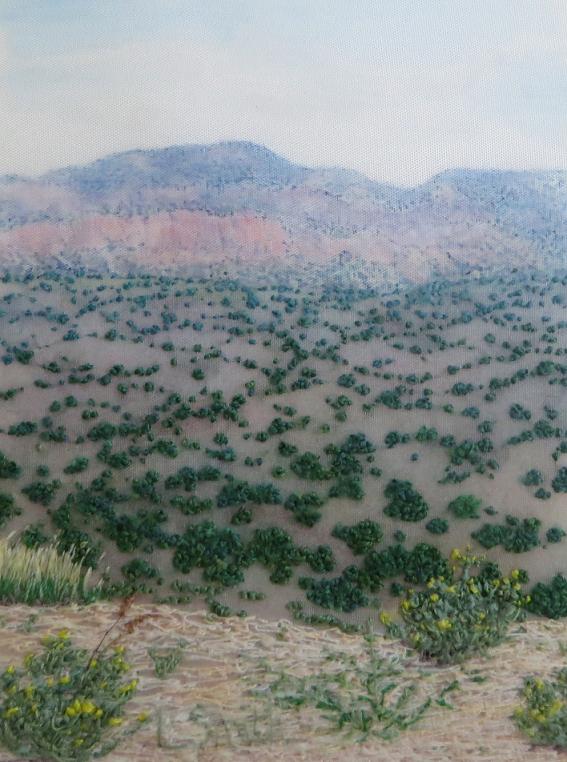
2.75 x 3.75 inches, free motion machine embroidery and hand sewing on hand-painted silk.
This is a view of mountains north of Santa Fe, New Mexico, a wonderful destination for art lovers. I’d expected the city to be a bit barren vegetation-wise but it was a lovely surprise to see native plants all over the place, and plenty of birds and butterflies.
I used machine embroidery only for the foreground rock. The rest is hand-sewn – I used embroidery floss and even some serger thread to give me more bulk quickly. I chose colours that graduate from warmer and darker in the foreground to cooler and paler in the distance, and also used a few tiny dabs of white pastel dye stick on thread in the very far distance to help get a hazy look. You iron on the pastel to set it.
It’s been so long since I did a blog post, I decided to do two at once. The post below contains all you ever wanted to know about painting dandelion stems but were afraid to ask. Sweet dreams!
Posted in Posts 2010-2019 | 1 Comment »
July 13th, 2014
This is a companion piece to Dandelion Seeds Step by Step. Here’s how I paint the stems.
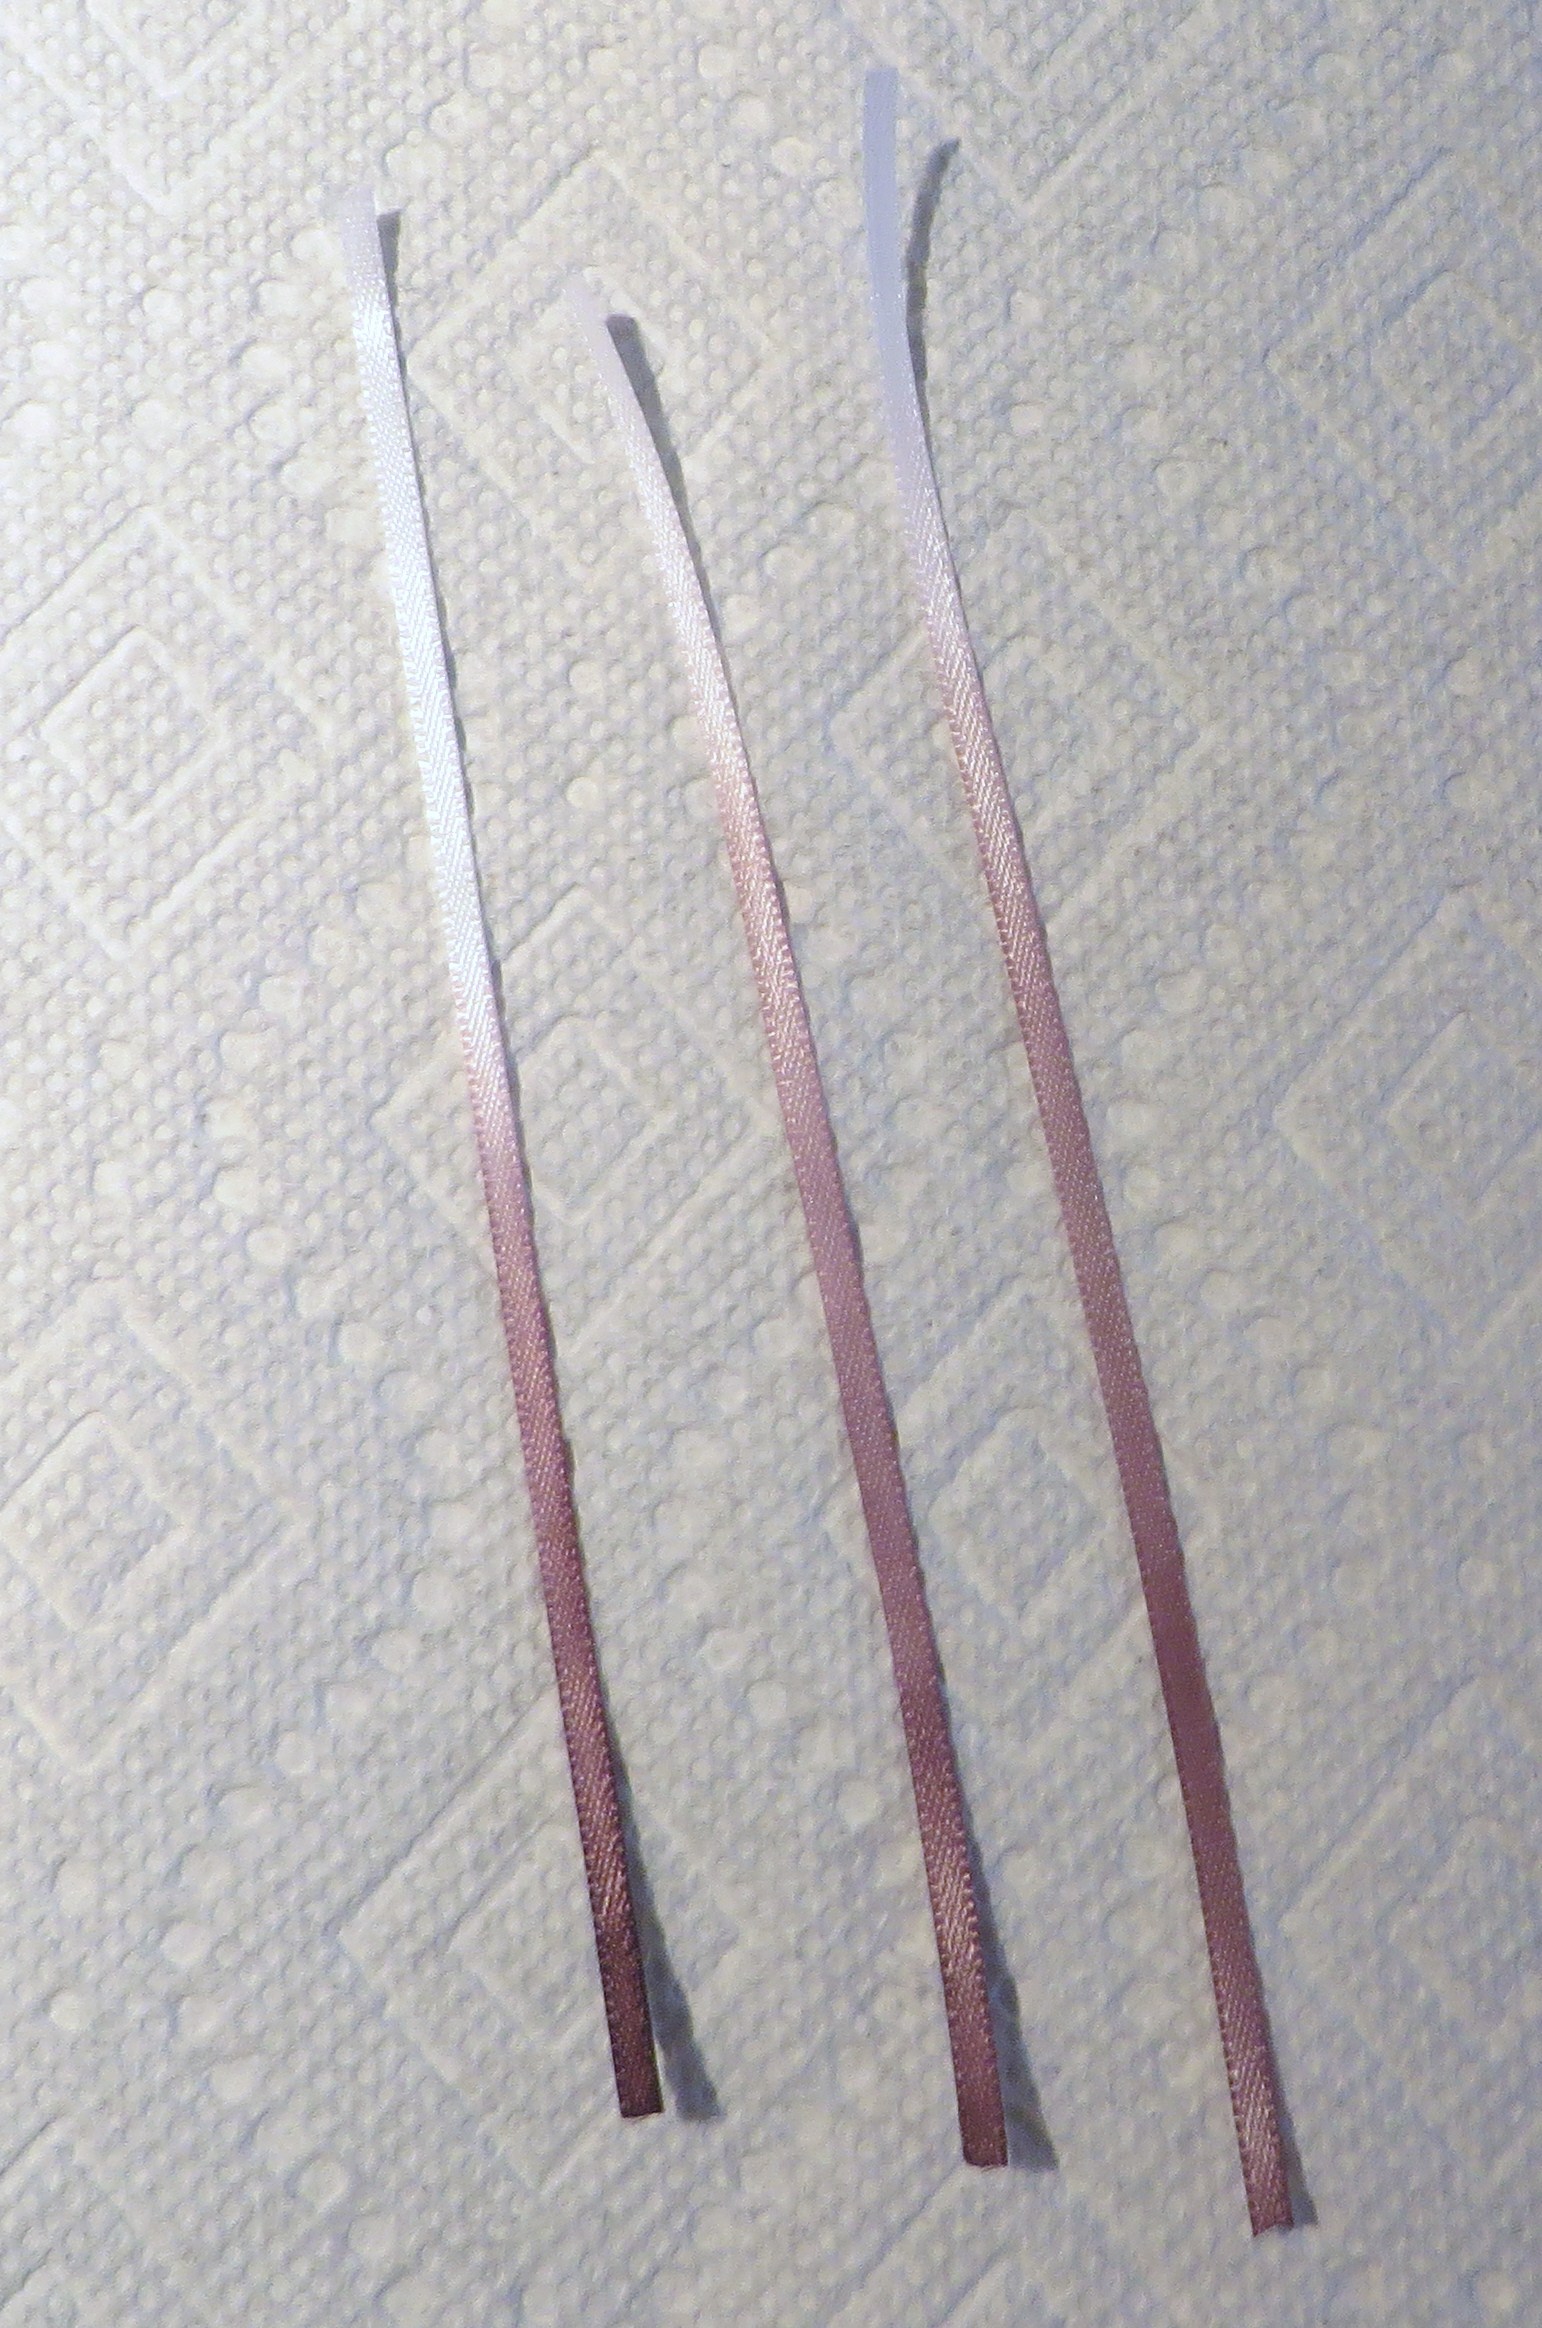
I start with lengths of ribbon. I buy it on small rolls from a dressmaking shop and cut it into 6-inch lengths. This ribbon’s 5 mm wide but sometimes I use wider depending on the scale of the picture I want to make.

I always mix my paint shades from the colours below (cyan, hermes red, medium, primary yellow and ebony). You can buy lots more premixed shades but I prefer to make my own. The medium (white) doesn’t work as a white colour exactly, but as a dilutant for other colours. If you paint it on the silk, it appears clear rather than white.
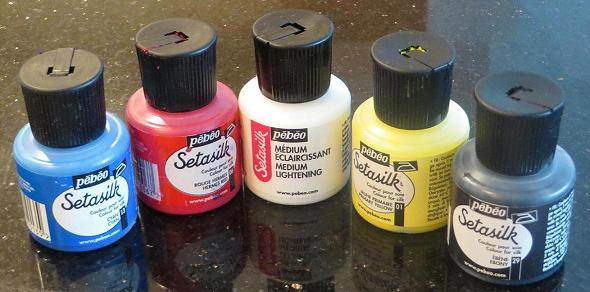
Some dandelion stems are green, some red, and some a blend of both. I like the blend. Here I’ve mixed up a dark red to start me off. You’ll see from the dirty state of my “white” that I’ve diluted the colour as well. I want it nice and liquid so that it flows easily along the ribbon.

Silk paint dries fast, so you have to work quickly. If you don’t, sections of the paint start to dry and you get tidemarks.
I apply the paint with my little brush, starting at the end of the stem and working towards the middle. Every few strokes, I dip the brush in the white and stir it into the mix. This keeps it liquid, and the colour becomes lighter as you do this, which helps create the blend between the red and green shades. Painting a brushful or two of white onto the faded end of the red colour will blend it into nothing.

Then do the same with green on the other ends of the stems. Where the green and red overlap slightly you get a soft brown.

Here my brush is loaded with slightly drier paint and I’m running it down the edge of the stem. The resulting darker edge helps give the illusion of a cylindrical stem.

Then I paint over the stem with the same colours, still nice and wet, anywhere I want more intensity. You can do this as many times as you like.

I deliberately paint lengths of ribbon that are longer than the stems I need. This way, I can choose the part of the stem I think came out best to use in a picture.
In the same session I paint some ribbons different shades of green, and some a golden brown. No need for any shading on these. They are then cut into narrower strips and used in place of thread to create sepals and seed pods.

Once the ribbons are dry, don’t forget to iron them to fix the paint. I do them on high for three minutes. You can always paint over them again if you need to, as long as you re-iron the painted area.

Posted in Posts 2010-2019 | No Comments »
May 19th, 2014

Hmm, the title is almost bigger than the picture…this one’s only 1.25 x 2.75 inches. Hand stitching on a hand-painted charmeuse background. The structure sticking out of the water is some kind of depth marker or maybe to warn of rocks below.
There are all sorts of colours besides blue in water, you soon find. That said, I’ve decided my next picture will be Not Generally Blue!
Posted in Posts 2010-2019 | No Comments »
